How to set up Tailwind CSS in an Angular project?
Hello awesome people👋, welcome back!
In this post, I am going to walk you through how to set up Tailwind CSS in an Angular project. It is going to be the easiest setup you have ever done.
Come on in.
This post is for projects that are using Angular version 11.2 and above, as it supports Tailwind out of the box. I will write a separate post on how to set up Tailwind for Angular projects that use version < 11.2.
Before heading straight to the setup, let's get to know quickly about TailWind CSS. You can jump through to Setup if you know about this CSS framework already.
What is Tailwind CSS?
Here is the definition from the official site:
A utility-first CSS framework packed with classes like flex, pt-4, text-center and rotate-90 that can be composed to build any design, directly in your markup.
- Tailwind CSS helps you to get started with CSS quickly though you don't have much CSS knowledge.
- Everything is class in TailWind.
- Comes with built-in support to install and build.
- Mobile-first. Yes, think about Mobile when designing a web page using TailWind.
- Has a bunch of ready-made components available on the internet.
- Has great community support.
- Customizable according to your needs.
- Crystal clear documentation.
These all come with a string attached though if you are a beginner. Because you will not gain deep knowledge of CSS as TailWind does everything for you.
Setup Tailwind CSS in Angular
Step 1: Let's create an angular project first.
ng n ng-tailwind-demo
Step 2: Awesome, now let's install Tailwind CSS under the project we created and make sure it is added as Dev dependency in package.json.
npm install -D tailwindcss
Step 3: Create Tailwind configuration file for the project, as we are going to customize few things. Will talk about that later in this post.
Running the below command under your project creates tailwind.config.js file.
npx tailwindcss init
tailwind.config.js
module.exports = {
  purge: [],
  darkMode: false, // or 'media' or 'class'
  theme: {
    extend: {},
  },
  variants: {
    extend: {},
  },
  plugins: [],
}
Step 4: Add below Tailwind directives to your styles.css file
@tailwind base;
@tailwind components;
@tailwind utilities;
Step 5: If you use styles.scss, make sure you add below directives
@import "tailwindcss/base";
@import "tailwindcss/components";
@import "tailwindcss/utilities";
Step 6: Let's verify if Tailwind configuration works in our project.
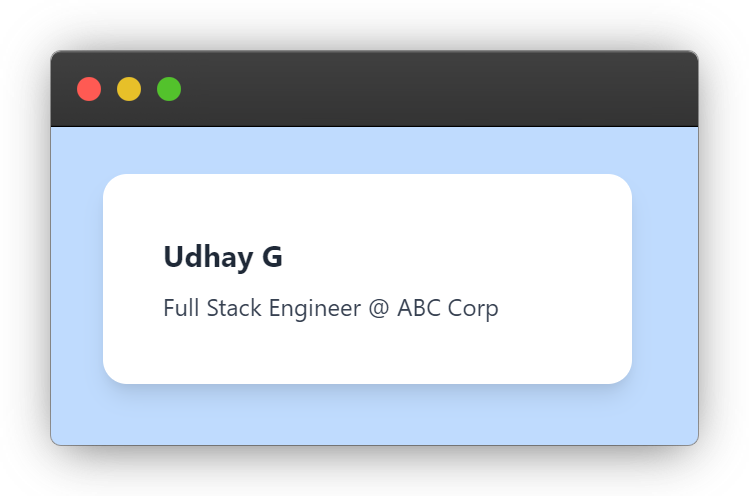
Add below piece of HTML to app.component.html, and make sure stop and run ng serve command as it builds Tailwind directives and adds the CSS to the stylesheet.
<div class="p-20 bg-blue-200">
  <div class="bg-white p-10 rounded-2xl shadow-lg w-full md:w-1/2 mx-auto">
      <h2 class="font-bold mb-2 text-xl text-gray-800">Udhay G</h2>
      <p class="text-gray-700">Full Stack Engineer @ ABC Corp</p>
  </div>
</div>
You must be seeing a simple card component.
I explained each and every line of this component in a separate post👇, take a look.
Purge unused Tailwind CSS classes
It's a good practice to remove unused styles from the project so that the final build size will be lesser in size and bring optimal performance to the web app.
Let's compare the bundle before and after purging unused Tailwind styles:
Before purge:
Build size is huge and at the same time build was failed because it exceeded the 1 MB target of build size.
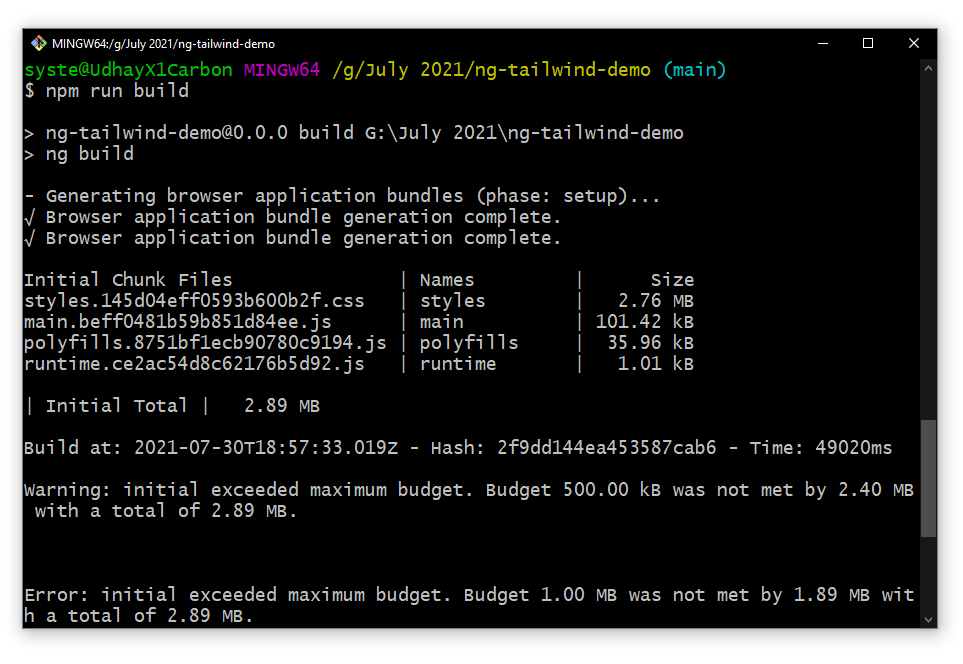
After purge:
Look at that. Build becomes slim, just ~100KB.
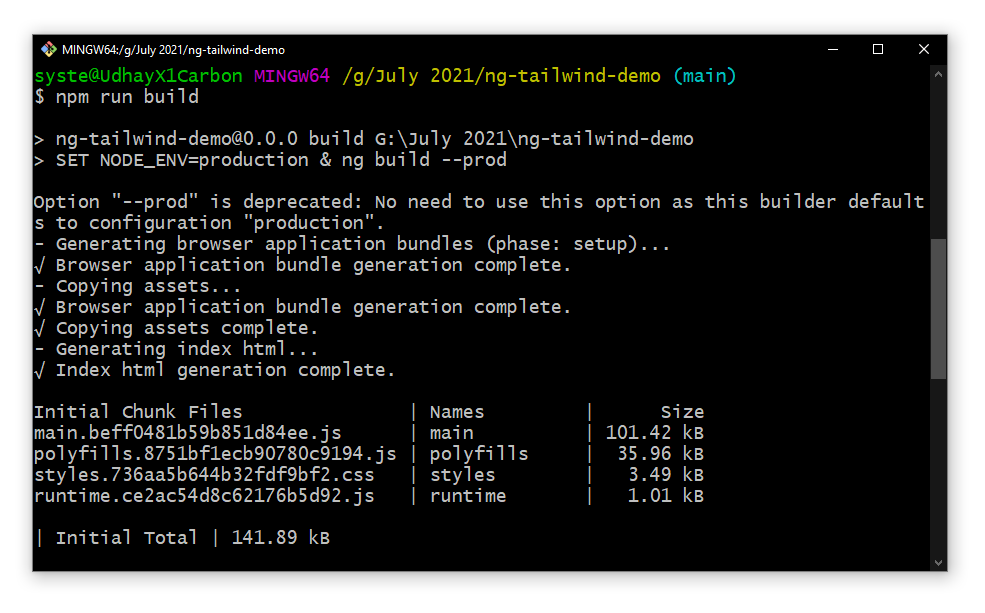
We can configure purging in two ways:
Method 1: Configure purge object in tailwind.config.js as given below:
module.exports = {
  purge: {
    enabled: true,
    content: [
      './src/**/*.{html,ts}',
    ]
  },
  darkMode: false, // or 'media' or 'class'
  theme: {
    extend: {},
  },
  variants: {
    extend: {},
  },
  plugins: [],
}
Method 2: Purge only for production build by configuration environment (NODE_ENV) in package.json and tailwind.config.js
tailwind.config.js
module.exports = {
  purge: {
  enabled: process.env.NODE_ENV === 'production',
    content: [
      './src/**/*.{html,ts}',
    ]
  },
  darkMode: false, // or 'media' or 'class'
  theme: {
    extend: {},
  },
  variants: {
    extend: {},
  },
  plugins: [],
}
package.json
For Windows:
  "scripts": {
     .
     .
    "build": "SET NODE_ENV=production & ng build",
     .
     .
  }
For non-windows:
  "scripts": {
     .
     .
    "build": "NODE_ENV=production ng build",
     .
     .
  }
If you are having any issues in configuring Tailwind for the Angular project, feel free to reach out to me in the comments section down below.
All ready you now know how to configure Tailwind CSS in Angular projects.
Hope you find this article useful, please feel free to share it with your friends/colleagues.
If you got any questions, don't hesitate to post them in the comments section.
Happy learning!
I tweet a lot about Web development, Java, and Productivity Hacks, follow me on Twitter at AskUdhay.
Here is one of my recent tweets:
Reference
https://tailwindcss.com/docs/installation#create-your-configuration-file
https://github.com/angular/angular-cli/pull/19935
https://tailwindcss.com/docs/optimizing-for-production#enabling-manually
About the author
• Full Stack Engineer • Auth0Ambassador • Organizer at AngularHive community • Speaker • Blogger
Comments
Join the discussionNo comments yet. Be the first to comment.